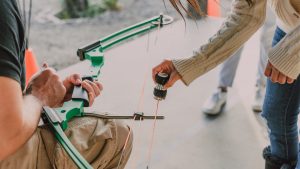
Archery is a sport that has been around for centuries, and while it may seem simple to hit a stationary target, doing so requires skill and practice. To improve your accuracy and precision, you need to have a target to shoot at. Having your own DIY target stand will give you a safe area to practice. An added benefit of DIY is that you won’t have to spend a ton of money on a professional one.
In today’s tutorial, we will show you how to make your own DIY target stand using some simple materials. You may even have them lying around your house. This stand is easy to make and very portable, so it’s perfect for taking with you on the go. Let’s get started!
Why Build an Archery Target Stand?
There are tons of reasons why you should consider building your own archery target stand instead of buying one from the store, including:
Stuck In One Spot
If you’re relying on a regular fixed target stand, you’re going to be stuck in one spot. This can make your archery practice quite dull and also limits your options for where you can shoot. A mobile target stand will give you options when it comes to choosing your practice location. You can set up your stand in the backyard, at the park, or even at an indoor range if you wanted to!
Easier To Store
Another significant advantage of a portable target stand is that it’s much easier to store. If you have a regular target stand, chances are it’s taking up a lot of space in your garage or basement. But by creating portable target stands, you can just fold them up and put them away when you’re done shooting.
Customizable
One of the best things about building your own target stand is that you can customize it to meet your specific needs. Maybe you want to add a shelf to hold your arrows, or perhaps you want to create a taller stand for longer-range shooting. Whatever it is, if you build it yourself, you can make it exactly the way you want!
Saves Money
Lastly, building your own target stand is also a great way to save money. If you’re buying a ready-made stand, it can be quite expensive. But by making your own, you can create a similar stand for a fraction of the cost. So if you’re on a budget, this is definitely the way to go. Plus, you likely already have the materials you need for this project lying around your house.
Easy PVC DIY Target Stand
So now that we’ve gone over some of the benefits of building your own target stand let’s take a look at how to do it. If you’re looking for a basic but functional target stand to hold your shooting targets, then this PVC pipe option is a great choice. It’s very easy to set up and take down, and it’s also very affordable. You can find all the materials for this project at your local hardware store.
Materials Needed for This Project
- 2 x 48″ PVC pipes (length depends on your desired height of the target stand)
- 4 x 12″ PVC pipes (can make longer to have wider feet)
- 1 x 24″ PVC pipe (can be made wider to hold wider targets)
- 4 x PVC T-joints
- 2 x PVC elbows
- PVC pipe cleaner & cement (if you want to permanently glue stand)
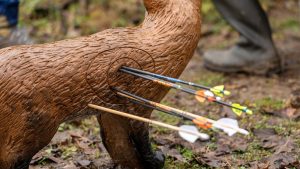
- Archery target (foam or straw)
- Sandbags or weights for stability
- Measuring tape
- PVC pipe cutter or hacksaw
- Marker
- Sandpaper (optional, for smoothing rough edges)
- Rubber mallet (optional, for securing pipes tightly)
How to Assemble Your Stand
- Measure and Cut PVC Pipes: Measure and mark the PVC pipes according to your desired height for the target stand. Typically, a height of around 4 to 5 feet works well. Use a PVC pipe cutter or hacksaw to cut the pipes at the marked points. You’ll have 2 equal-length pipes for the vertical posts of the stand, 4 equal length pipes for the base, and 1 piece for the crossbar.
- Smooth Rough Edges (Optional): If you want, you can use sandpaper to smooth any rough edges on the cut PVC pipes for safety and aesthetics.
- Assemble the Base: Connect two of the 12″ cut PVC pipes using a T-joint to create one half of the base of the stand. Repeat this for the other half. Insert the pipes into the T-joints securely. These two pieces will form the base of the target stand.
- Add Vertical Posts: Attach the two 48″ cut PVC pipes to the open ends of the T-joints on the two base pieces. These pipes will be the vertical posts of the stand.
- Add Crossbar: Insert the PVC elbows onto the top ends of the vertical posts. Connect the elbows with the remaining 24″ PVC pipe to create a crossbar. This crossbar provides stability to the stand.
- Create the Target Holder: There are many ways to secure your target to your stand. Consider using ropes wrapped around the crossbar or you could even screw metal eyelets to the bottom side of the crossbar to give something to hang targets from.
- Stabilize the Stand: To prevent the stand from tipping over, place sandbags or other form of weight on the front and back of the base of the stand. This will add stability and ensure that the target stand remains upright during use.
- Secure the Target: Attach your archery target, perhaps one of these broadhead archery targets, to the target holder you created. Make sure it’s fastened securely and won’t fly off.
- To Glue or Not to Glue: If you want to add stability you should glue your stand together. However, if you’d like the added benefit of portability, you can skip the glue so you can break down your stand at any time.
Your DIY target stand is complete. You’ll be able to attach various targets to this stand, such as foam targets like the 365 archery target, or even a paper archery targets. Now you are all set to practice and hone your archery skills from the comfort of your own backyard.
Alternate DIY Target Stand Ideas
Above, we listed one of the simplest tutorials available for DIY target stands. However, there are plenty of other options out there. You can use wood, metal, or even cardboard if you feel crafty. Just make sure that whatever material you choose is sturdy enough to support your target. Here are a few alternative tutorials you may want to consider when building your stand:
DIY Wood Target Stand
If you’re looking to create a wooden target stand for less than $25, you’ll want to watch this incredible DIY wood archery target stand tutorial. The best part of this tutorial is that it requires absolutely very little in terms of tools to set it up or take it down, which makes it perfect for on-the-go archery practice.
DIY Exercise Mat Archery Target
If you want to create an archery target stand that won’t require any staking down, this DIY exercise mat archery target is a great option. Not only does this tutorial not require any tools, but you can create it for less than $100. Plus, with such a large target, you’ll be able to practice your archery skills from anywhere.
Should I Buy a Stand Instead?
Now that you know how to make your own DIY target stand, you may wonder if it’s even worth buying one. Archery target stands can range in price from $20-$200, depending on the material, size, and weight which can make them a bit of a splurge. However, they’re worth the investment if you plan on doing any serious target practice.
While a DIY stand will provide the flexibility to customize it to your specific needs, you may want to consider buying a target stand if you’re looking for something more heavy-duty. At the end of the day, the decision is up to you. If you have the time and patience to put together a DIY stand, then go for it!